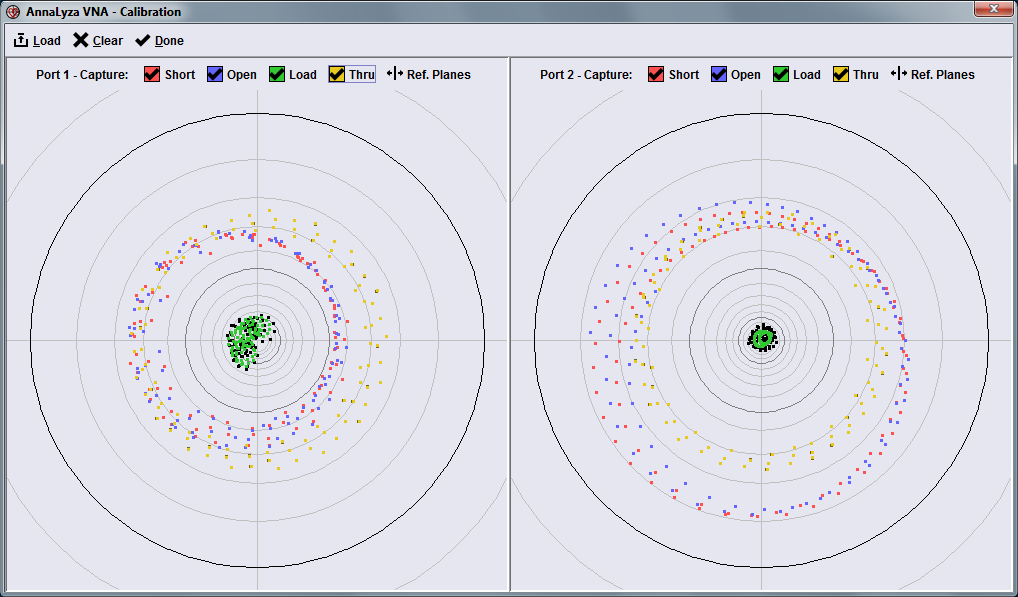
Calibration Screen. Click for full-size image.
The software is available as a runnable JAR file or as a Windows executable. In both cases you also need to make sure that Java 8 or later is installed.
No installation is required for the software or the device driver.
Save the file wherever you like and double click to start the application.
If double-clicking the JAR file doesn't work then you can start it from the command line: java -jar AnnaLyza-VNA.jar
In Windows 8 and 10 you may have to add a security exception to run the executable. Try the JAR file if that doesn't work.
The application works under MacOS 10.12 but the current version produces an error (SIGSEGV) when exiting.
The application may not detect the device unless it is started with root access.
To solve this problem you have to create the file /etc/udev/rules.d/99-myhid.rules with the following content:
ATTRS{idProduct}=="8B96", ATTRS{idVendor}=="10C4", MODE="0660", GROUP="plugdev"
Under Ubuntu the sampling rate is lower compared to Window or Mac.
When you start the application for the first time you have to accept the EULA. After that you will be prompted to plug in the device if you haven't done so already.
Demo Mode: If you don't have a device, you can choose to run the application in demo mode in which traces are generated randomly. The demo mode allows you to play with all the functionality, only the calibration screen is not available.
If you have a device, then plug it in and the prompt will go away automatically once the device is recognized. When you run the software for the first time the calibration screen will come up. Otherwise it will load the previously saved calibration.
The calibration screen shows you the raw S11, S21, S22, and S12 measurements. Measurements where port 1 is the output are on the left side; measurements where port 2 is the output are on the right side.
Connect your cables and calibration standards and press the appropriate buttons to capture the current measurements. For example, once you have terminated port 1 with a short circuit, press the "Short" button on the left side to capture. Depending on your accuracy requirements and what you are planning to measure you don't need to complete a full calibration. You could even skip the procedure and use the VNA uncalibrated.
Note that the traces have a bit of a time lag because during calibration some extra filtering is active to reduce the noise.
Once you are done, press the "Done" button and you will be prompted to save the calibration. Saving is optional.
You can learn more about calibration here.
After calibration you will see the Smith chart window.

The trace list in the bottom right corner allows you to select which traces are visible and their colors. You can also select the trace for which you want to see detailed information in the marker section.
Use these buttons to open new Smith chart and magnitude/phase chart windows:
![]() ,
,
![]() .
You can have as many chart windows open as you want (for example, to display different sets of traces).
.
You can have as many chart windows open as you want (for example, to display different sets of traces).
You can hover with your mouse cursor over any button to learn what it is used for. Refer to the documentation for more details.